Record & Playback
Record & Playback is the core recording workflow in Robonito. You interact with your web application naturally, and Robonito captures every action as a test step. Those steps can then be replayed automatically — on demand or on a schedule — to verify your application works correctly.
How It Works
- Record: You open the Robonito recorder, interact with your app (clicking, typing, navigating), and every action is captured as a step.
- Save: The recording is saved as a structured test case in Robonito.
- Playback: Robonito replays your steps exactly as recorded, checking that the app behaves the same way each time.
Starting a Recording
- Open a Web Test Case in the Test Explorer.
- Click the Record button at the top of the interface.
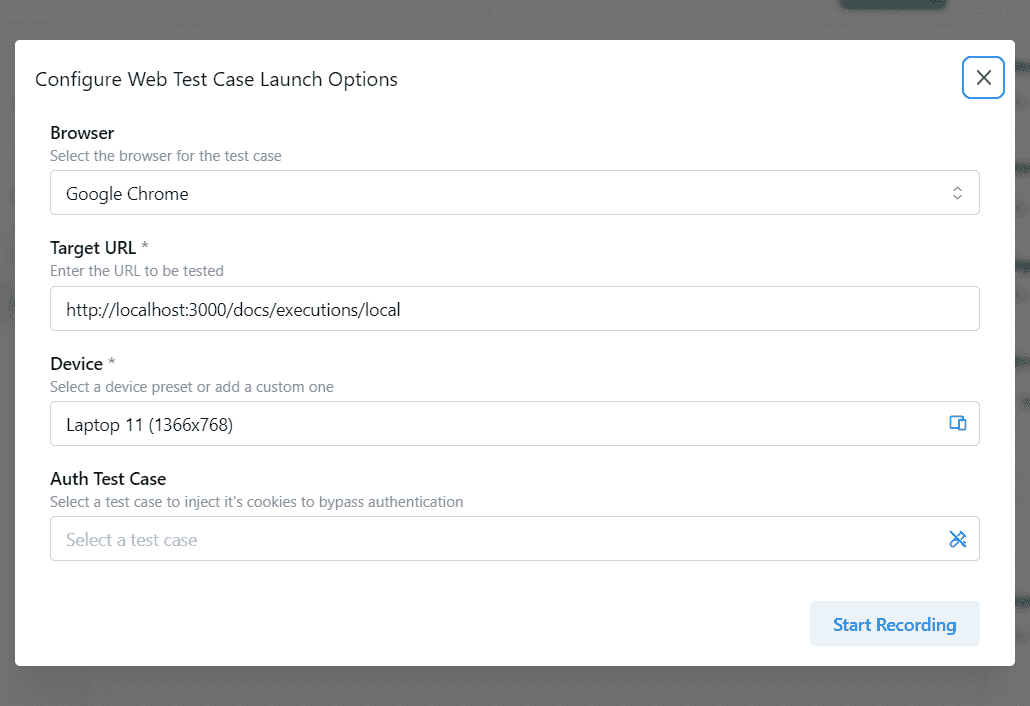
- In the Configure Launch Options dialog, verify:
- Browser (e.g., Chrome)
- Target URL (the starting page of your app)
- Viewport (e.g.,
1280×1024for desktop) - Auth Test Case (optional — skip the login screen automatically)
- Click Start Recording.
During the Recording
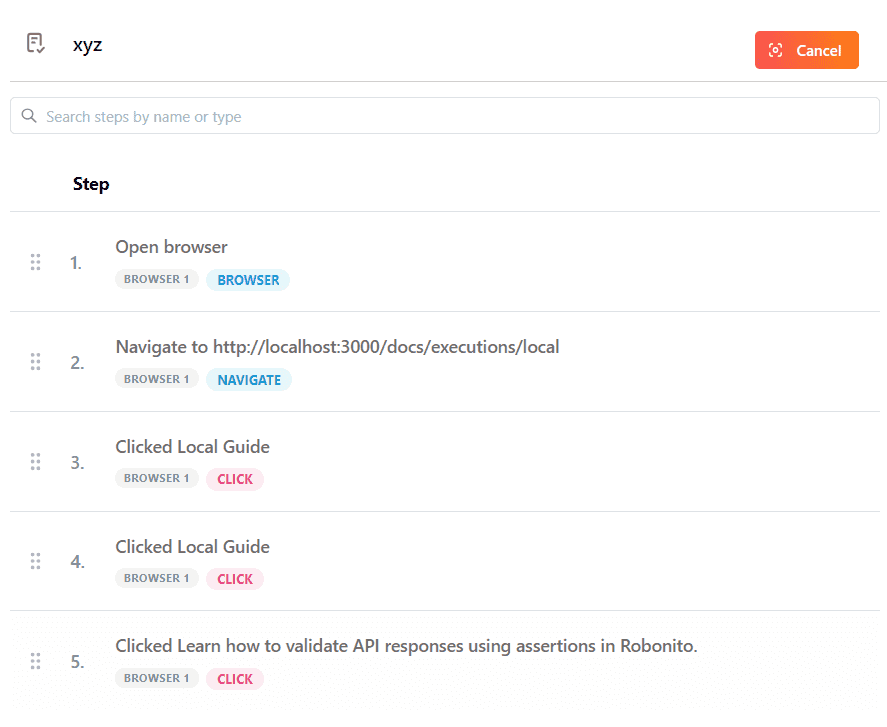
A browser window opens and Robonito begins listening. Every action you take is converted into a step:
| Action | Step Created |
|---|---|
| Click a button | Click step |
| Type into a field | Input step |
| Navigate to a URL | Navigation step |
| Hover over an element | Hover step |
Stopping and Saving
When you've finished recording your flow:
- Click the Stop button in the recording toolbar.
- Robonito finalizes all captured steps.
- Your test case is saved and ready to run.
Running Playback
To replay your recorded test:
- Open the test case in the Test Explorer.
- Click Execute.
- Choose Local or Cloud as the execution target.
- Robonito replays every step in order and logs a Pass or Fail for each.
See also: Execution Guide | Editing Steps