Tags
Tags are colored labels you attach to test cases to categorize, filter, and organize your test suite at a glance. A tag could represent a feature area (checkout), a test priority (smoke), a team (mobile-squad), or a release milestone (v2.1).
Tags are workspace-scoped — they are shared across all suites and test cases in a workspace, so teams can standardize their taxonomy without duplicating effort.
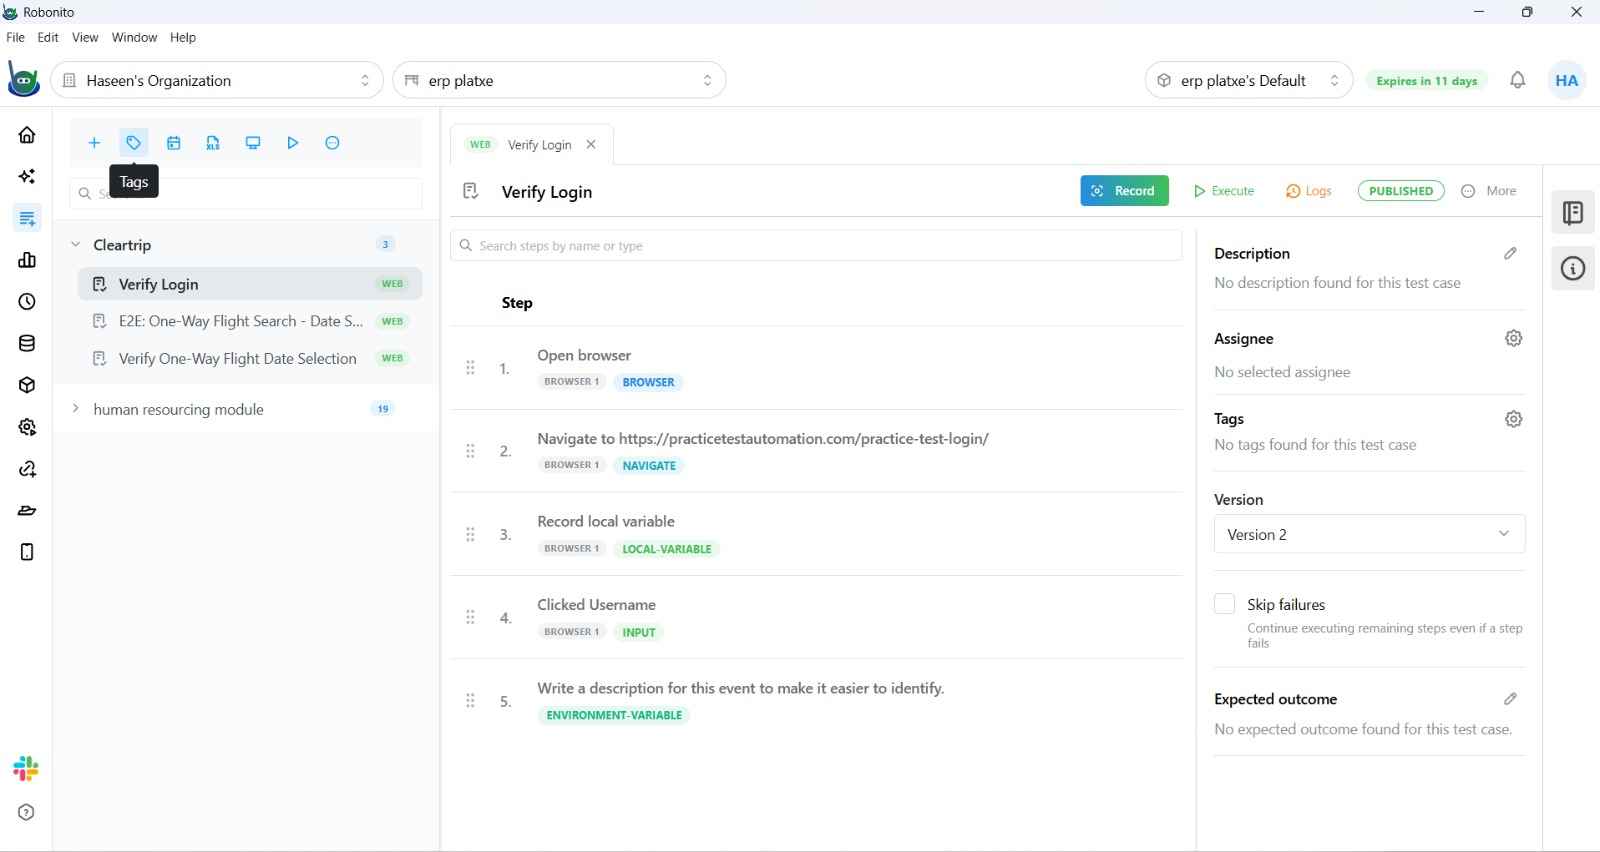
Creating a Tag
- Navigate to any test case in the Test Explorer.
- Click the Tags section in the test case detail panel (or click the tag icon in the suite sidebar context menu).
- Click + New Tag or the Edit Tags button.
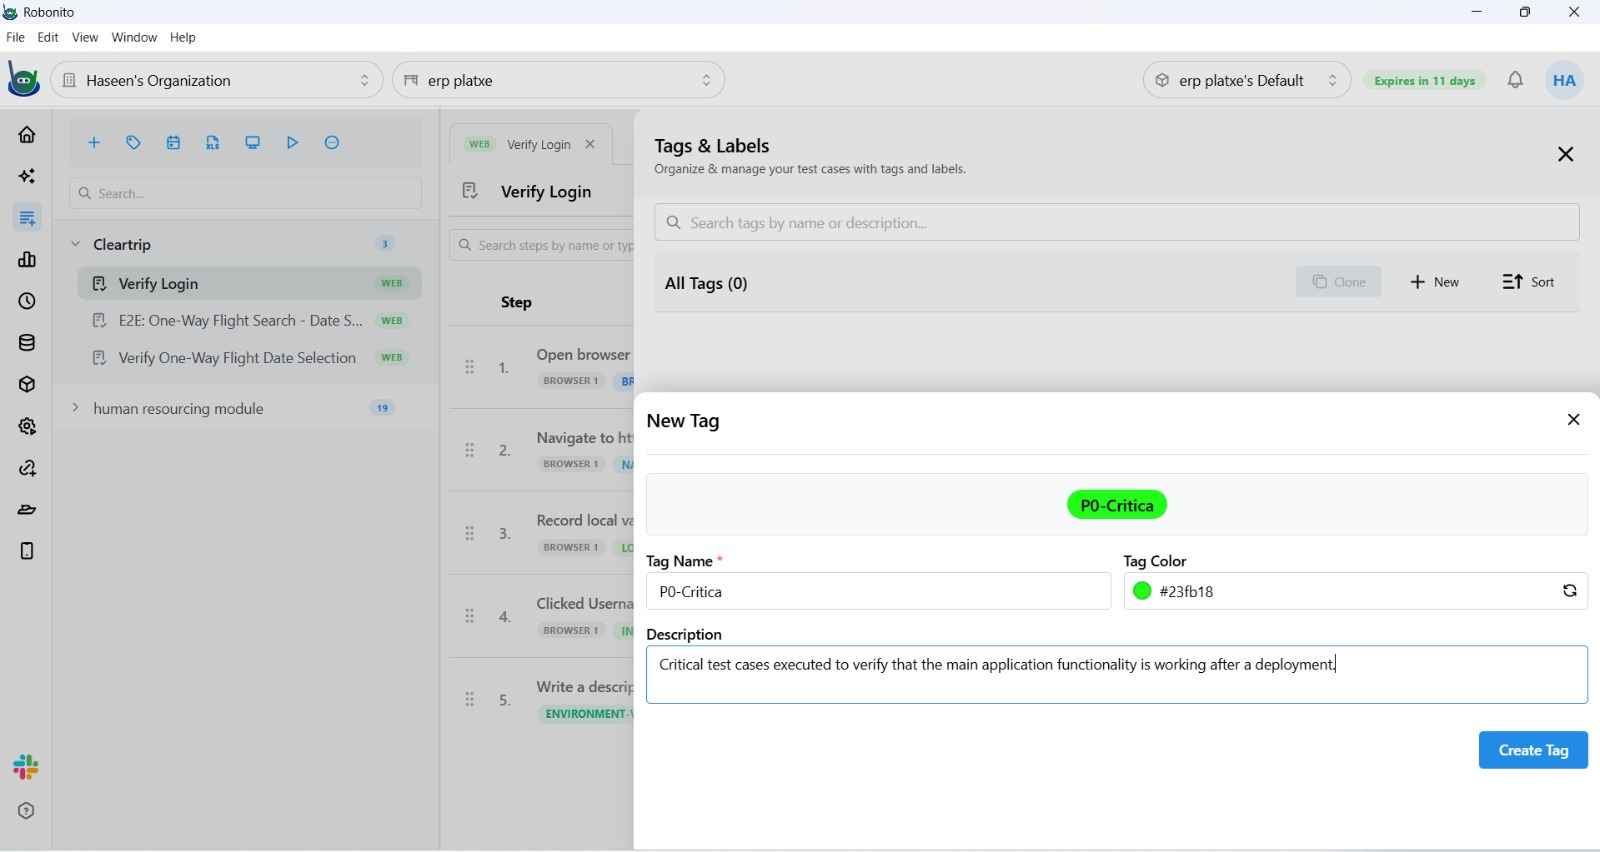
- In the Tag Editor:
- Name — enter a short, descriptive label (e.g.,
regression,smoke,P0). - Description — optional note explaining what this tag represents.
- Color — pick from swatches or enter a custom hex color. The color is used as the pill background in the UI.
- Name — enter a short, descriptive label (e.g.,
- Click Save.
Applying Tags to a Test Case
- Open the test case you want to label.
- In the Tags field, click the input and type to search existing tags, or select from the dropdown list.
- Select one or more tags — multiple tags can be applied to a single test case.
- Changes are saved automatically.

Filtering by Tag
You can filter the test case list to show only tests that carry a specific tag:
- In the Test Explorer, open the Filters panel.
- Select one or more tags from the Tags filter.
- The list updates in real-time to show only matching test cases.
This is particularly useful when you need to run a specific subset of tests — for example, filtering for smoke tests before a release, or P0 critical-path tests during an incident.

Managing Tags
Editing a Tag
- Open the Tag Manager (accessible from the workspace settings or the tag editor).
- Find the tag and click the edit icon.
- Update the name, description, or color and save.
All test cases that carry this tag will immediately reflect the updated label and color.
Deleting a Tag
- Open the Tag Manager.
- Click the delete icon on the tag you want to remove.
- Confirm the deletion.
The tag is removed from all test cases it was applied to. This action is permanent and cannot be undone.

Tips for Organizing with Tags
Use a consistent taxonomy across your team to get the most out of tags:
- Priority tags:
P0,P1,P2— lets you quickly filter critical-path tests before a deployment. - Type tags:
smoke,regression,exploratory— for quick pre-release smoke runs. - Feature tags:
auth,checkout,payments,onboarding— filter tests by product area. - Team tags:
frontend,backend,mobile-squad— useful in larger orgs with multiple QA teams. - Release tags:
v2.1,sprint-42— temporarily label tests related to a specific release cycle.
Tags can be combined freely. A test might carry smoke, checkout, and P0 at the same time, making it eligible for any of those filtered views.