AI Studio
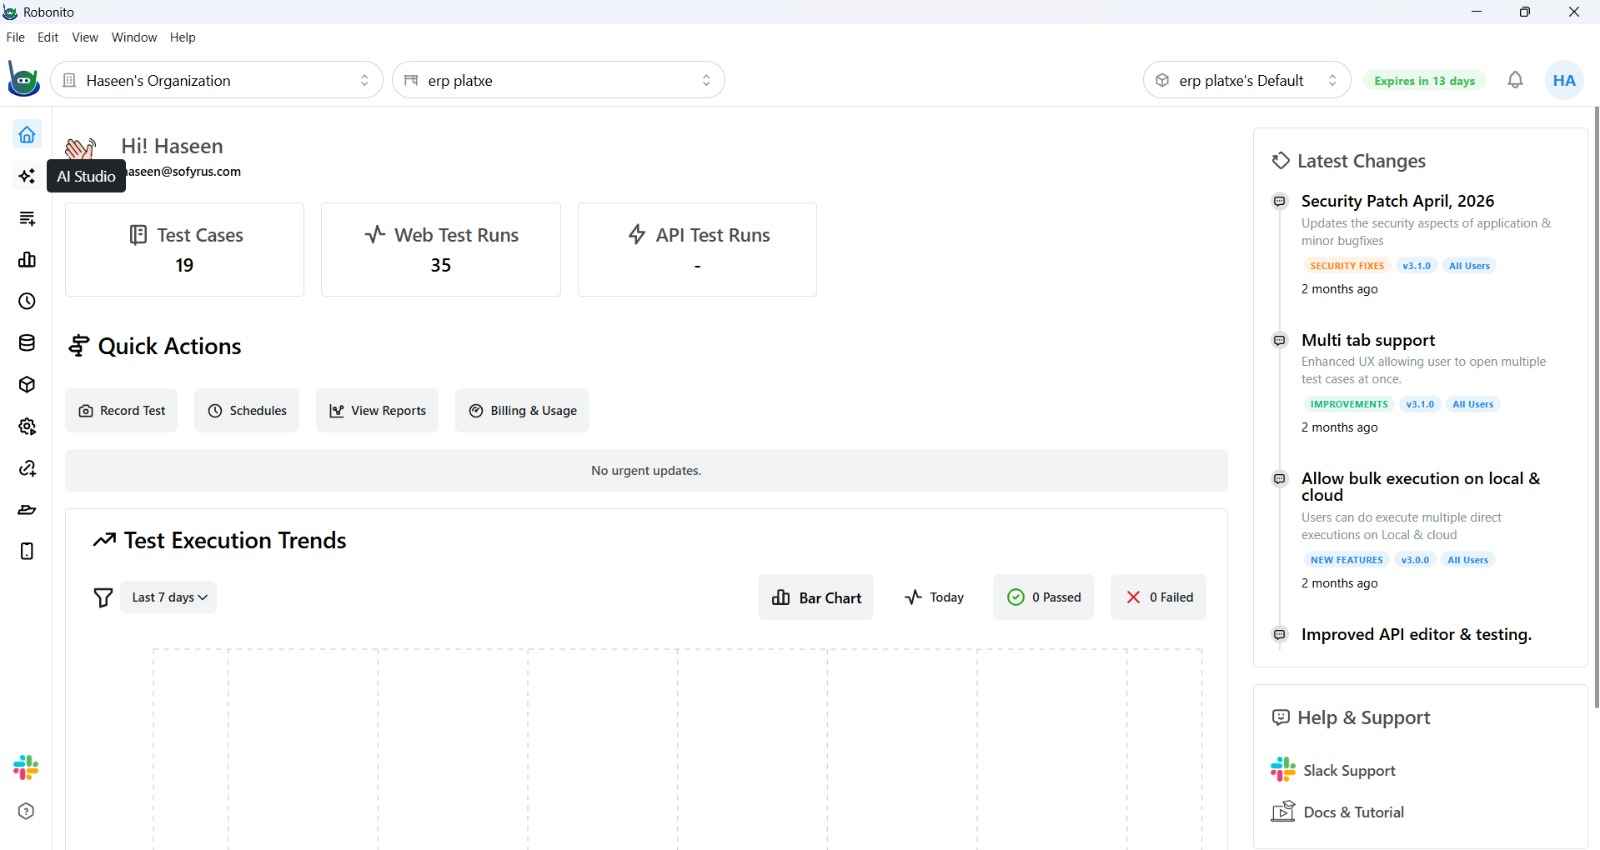
AI Studio is Robonito's autonomous testing agent. Instead of recording clicks manually, you describe what you want to test in plain language, and the AI agent browses your application, generates test steps, saves them as real test cases, and even classifies failures — all without writing a single line of code.
What AI Studio Can Do
- Generate test cases from a natural language description — describe a user flow and the agent executes it on a live browser, capturing each step automatically.
- Explore your application autonomously — the agent crawls your entire app surface using a breadth-first strategy and maps all discovered pages and interactions.
- Plan before acting — in Plan Mode, the agent researches your goal and presents a step-by-step strategy for your approval before touching the browser.
- Classify bugs — when a test run fails, the agent analyzes the failure and labels it as a real bug, environment issue, broken selector, or flaky test.
- Save directly to your test suite — generated test cases are one click away from being added to any suite in your workspace.
- Support multiple AI providers — use Robonito's default model or bring your own API key for Anthropic Claude, OpenAI GPT, Google Gemini, OpenRouter, or a local Ollama model.
Supported Platforms
AI Studio works across all test platforms Robonito supports:
| Platform | Description |
|---|---|
| Web | Automates a Chromium browser against any web application |
| API | Generates API test cases from endpoint descriptions or Postman collections |
| Android | Controls an Android emulator via ADB — requires Mobile Setup |
| iOS | Controls an iOS simulator via Appium — requires macOS with Apple Silicon |
| Desktop | Automates desktop application workflows |
Getting Started
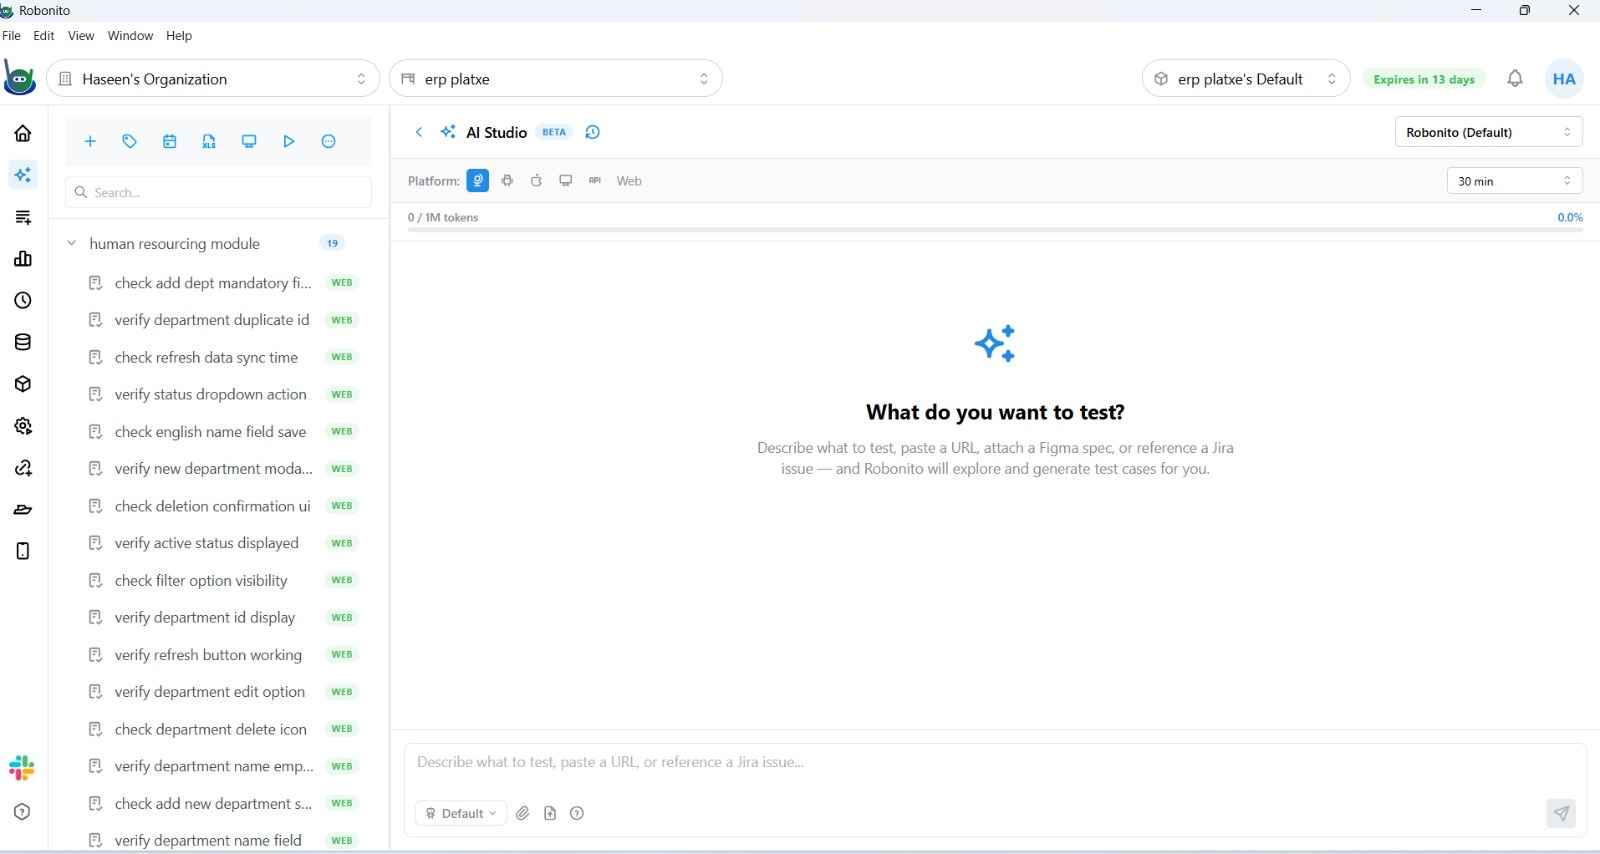
1. Open AI Studio
Click the AI Studio icon (sparkle icon) in the left sidebar.
2. Select a Platform
Choose the platform you want to test: Web, API, Android, iOS, or Desktop. The input hints update to guide you on what to enter.
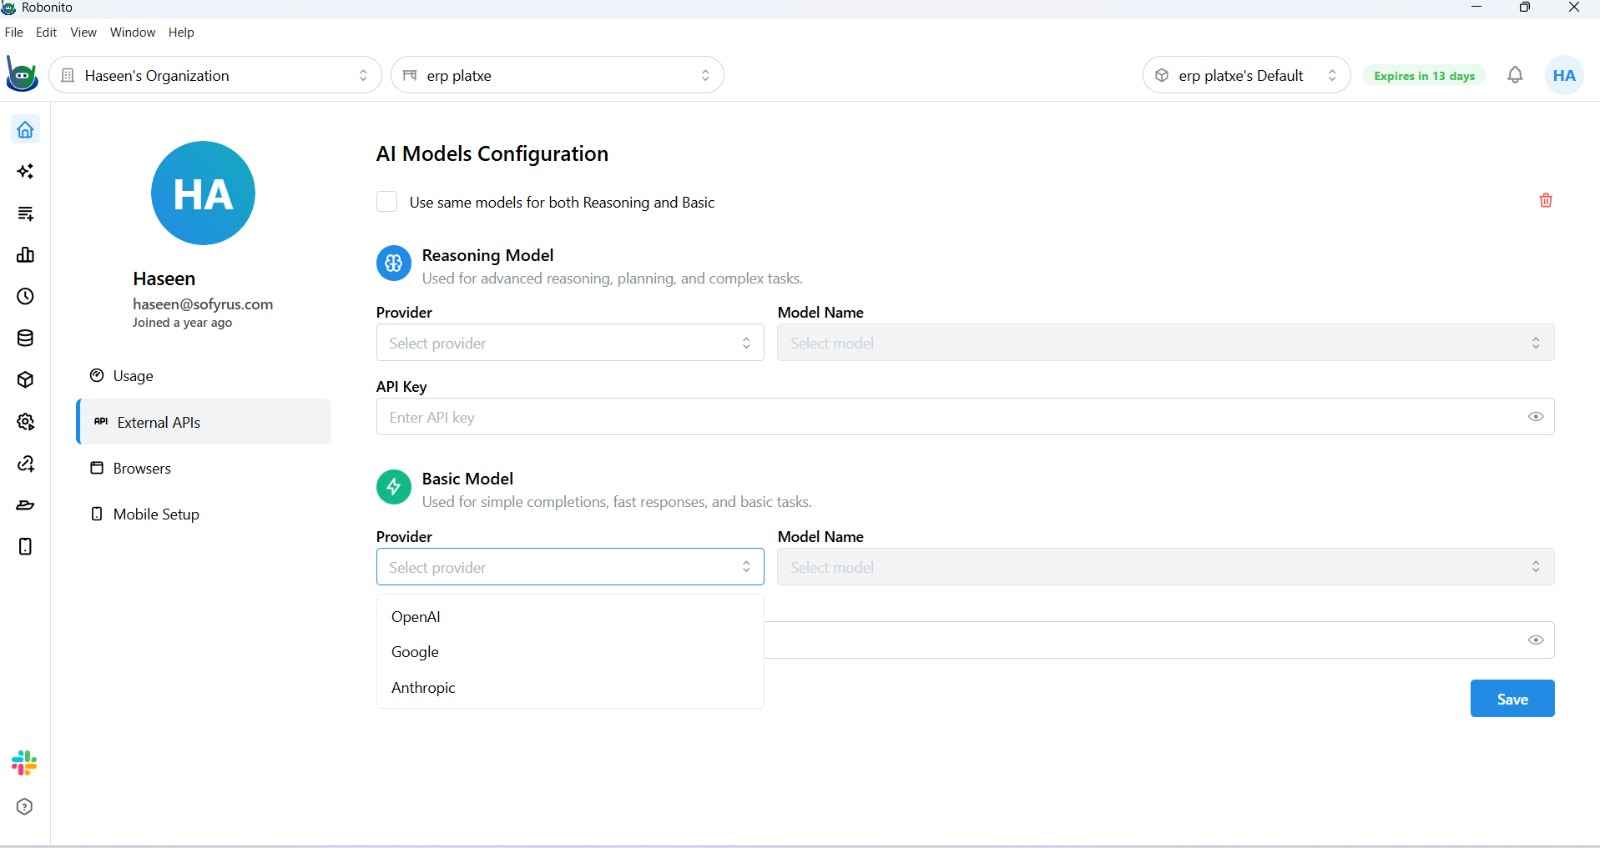
3. Configure the AI Model
Click the model selector dropdown to choose:
- Robonito (Default) — fully managed, no API key needed.
- Claude Sonnet / Opus / Haiku — enter your Anthropic API key.
- GPT-4o / o1 — enter your OpenAI API key.
- Gemini 3.1 Pro / Flash — enter your Google API key.
- OpenRouter — browse hundreds of models from a single API key.
- Ollama (Local) — run any Ollama-compatible model on your machine.
4. Describe Your Goal
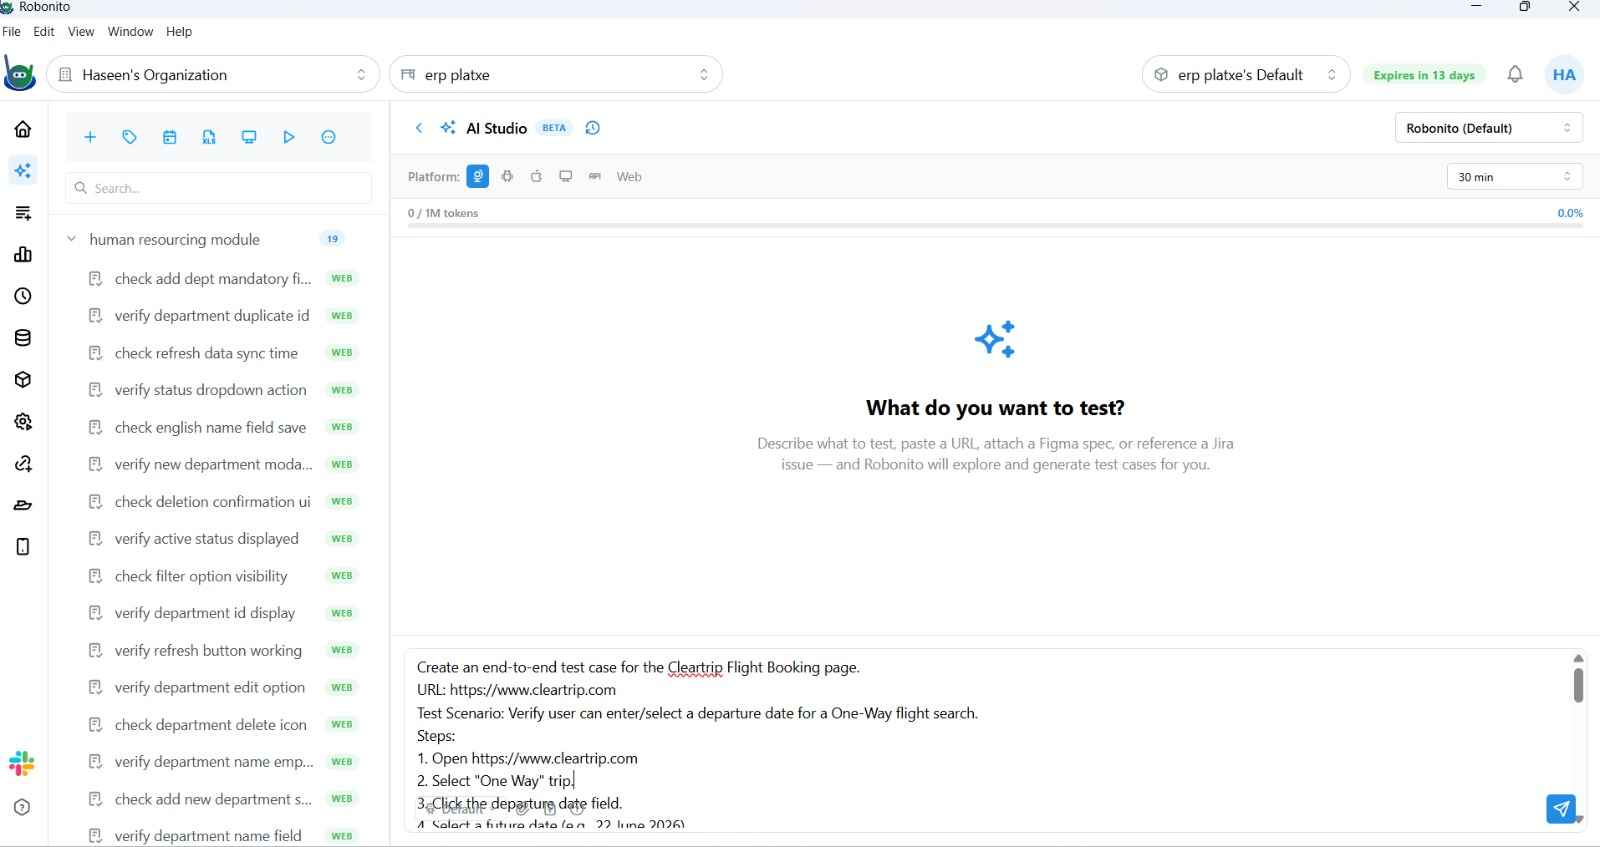
Type your test objective in the chat input. Be specific — include the URL, the user action, and what you expect to happen:
"Go to https://staging.myapp.com, sign in with
qa@myapp.com/testpass123, add the first item in the catalog to the cart, and verify the cart count shows 1."
5. Send and Observe
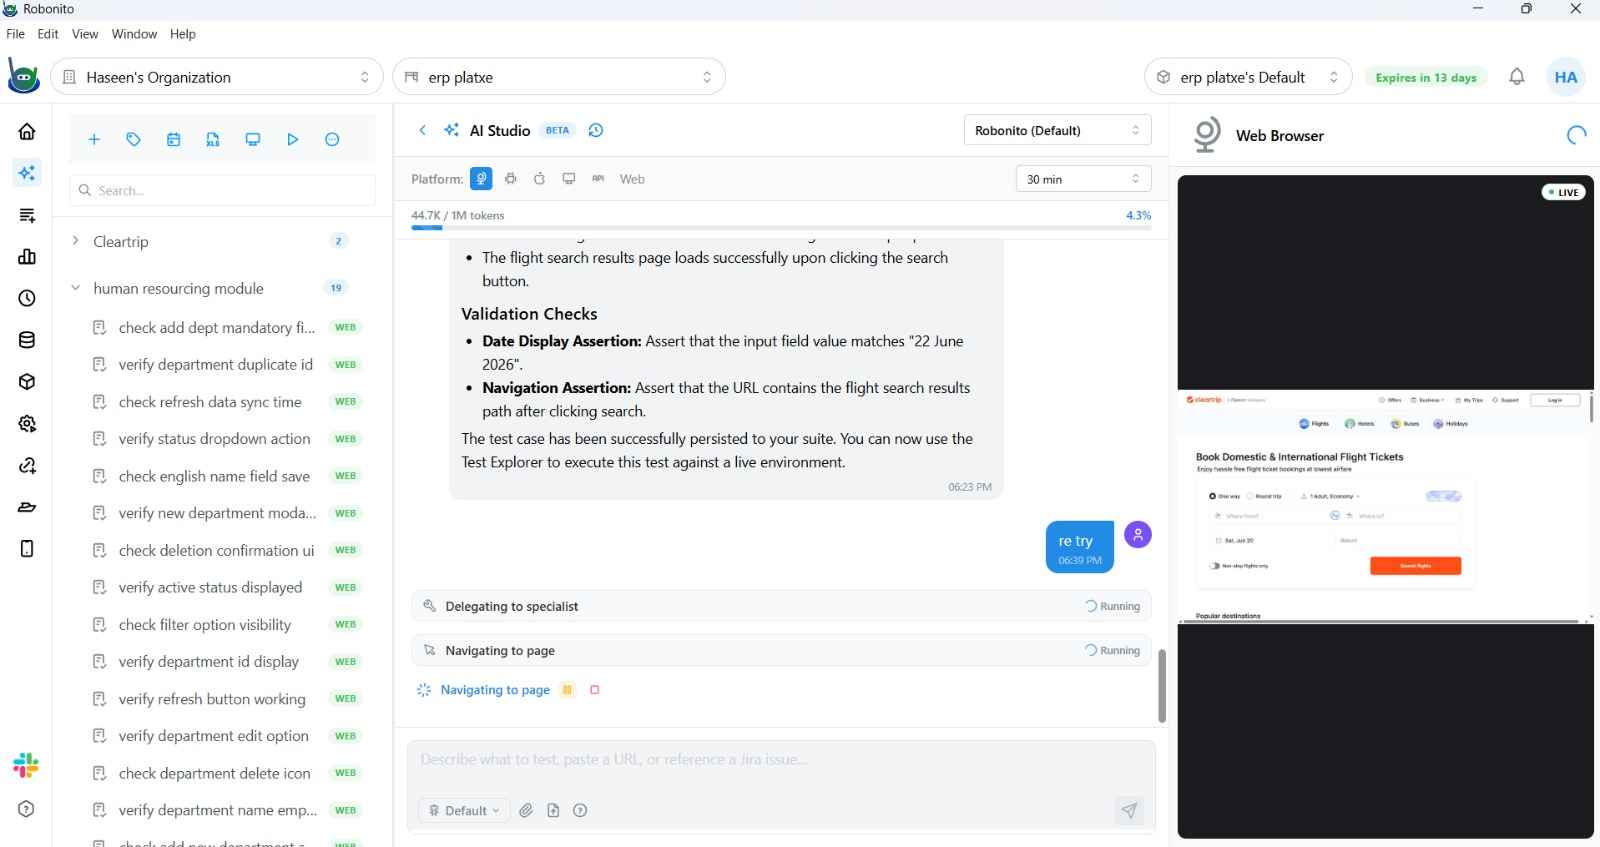
Click Send (or press Enter). The agent:
- Opens a browser and navigates to the target URL.
- Performs each action, streaming real-time progress in the chat panel.
- Takes screenshots at each step and displays them in the browser mirror.
- Generates a structured test case and surfaces it inline in the chat.
Agent Modes
Default Mode
The agent immediately starts interacting with the application, performing actions and generating test steps as it goes.
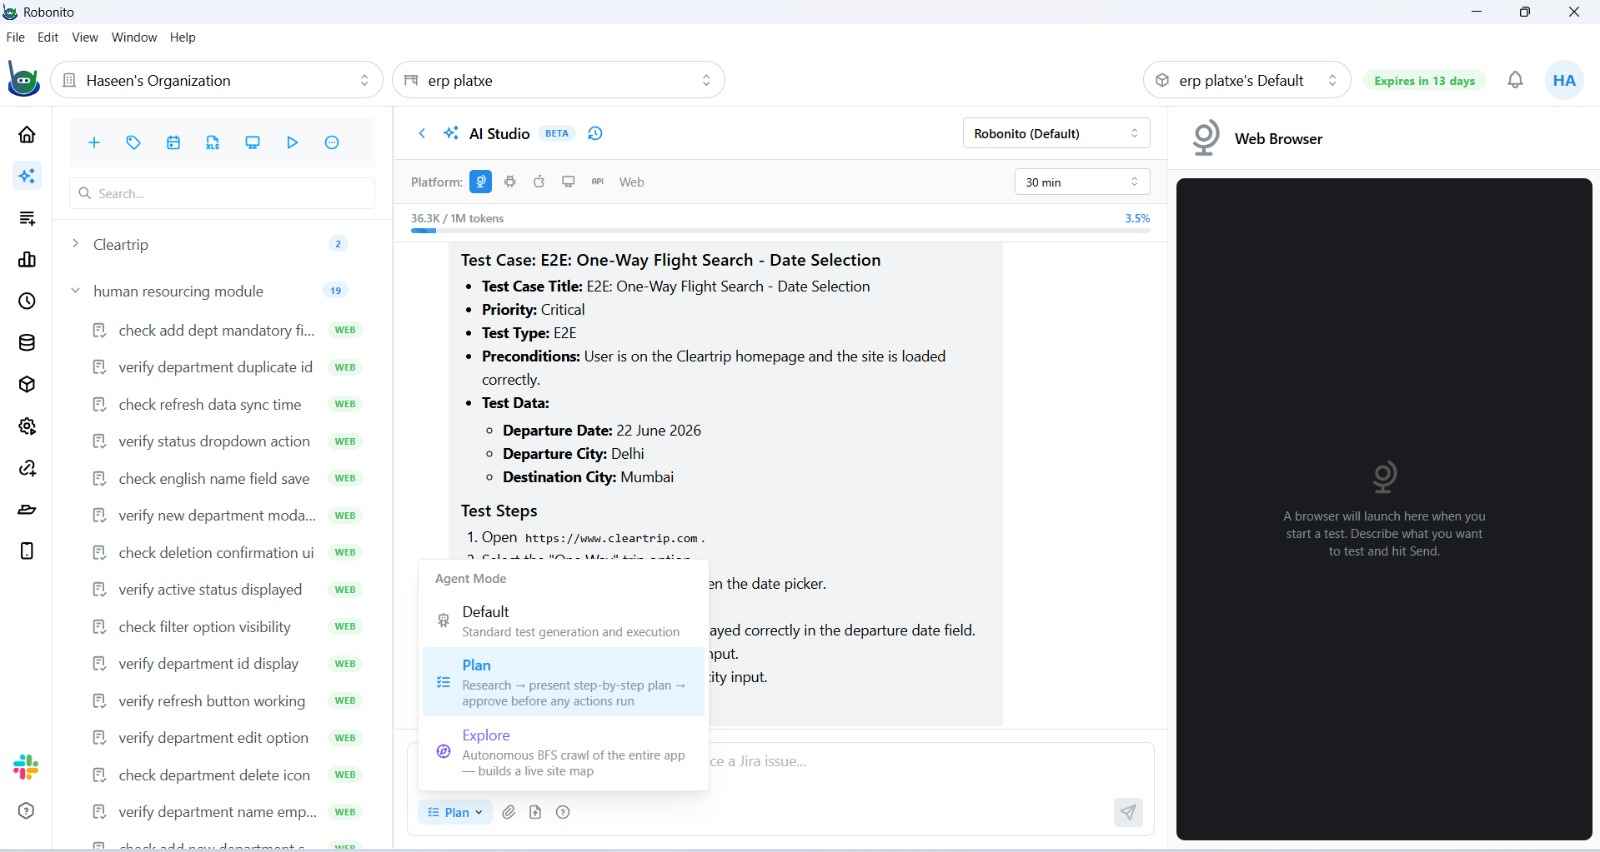
Plan Mode
The agent first researches your goal and produces a Strategic Plan — a step-by-step breakdown of what it intends to do. You review and approve (or edit) the plan before the agent executes any browser actions. Best for complex, multi-step flows where you want control over the approach.
To activate: click the Plan toggle in the input toolbar before sending your message.
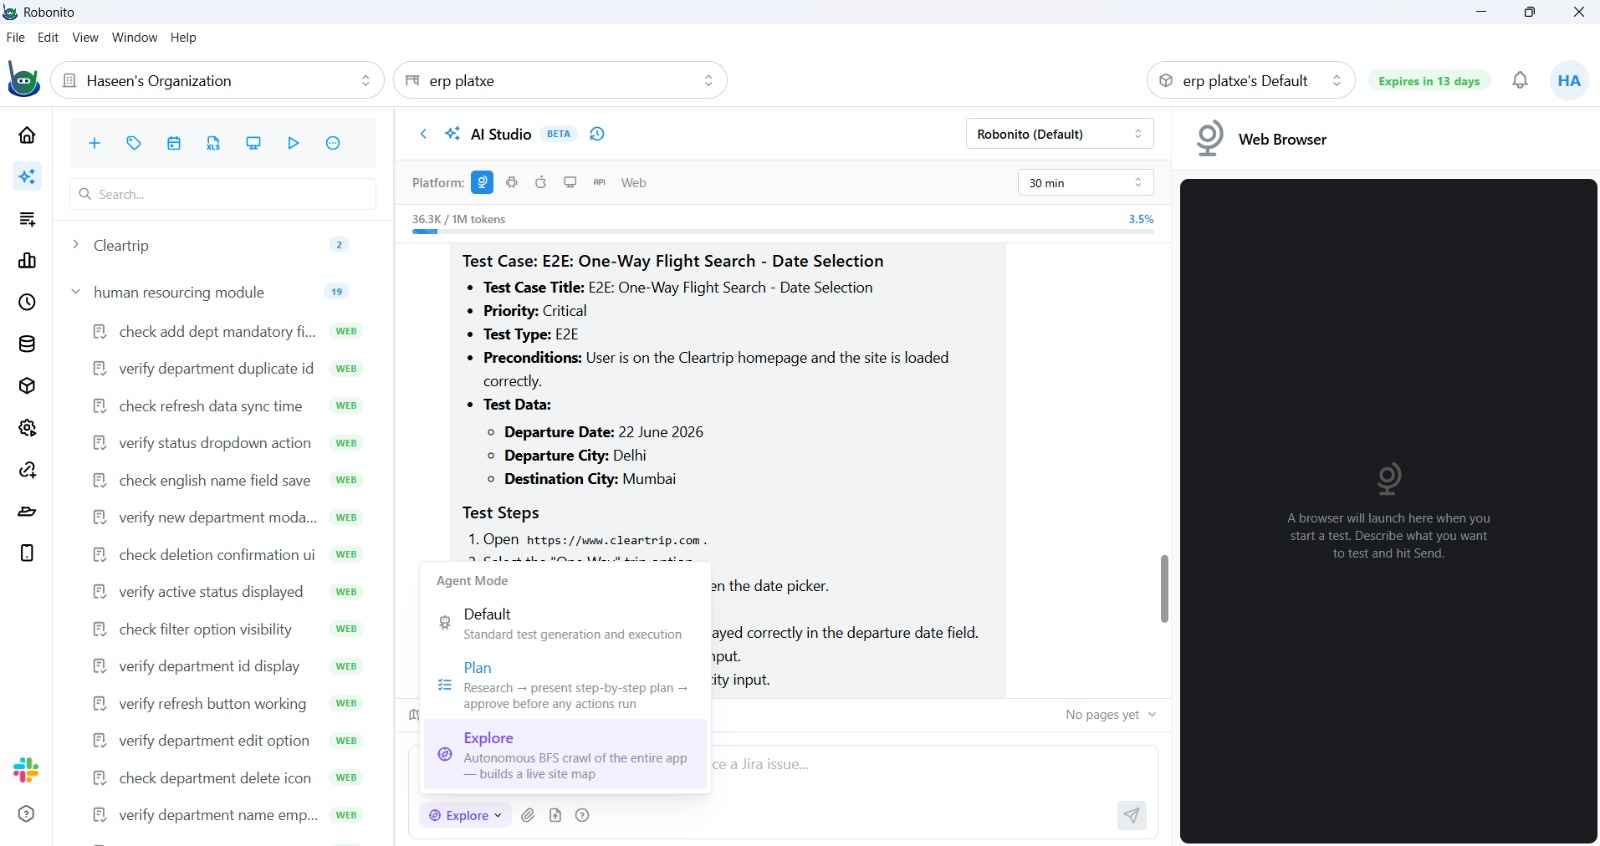
Explore Mode (Web only)
The agent autonomously crawls your entire application using a breadth-first search — following every link, button, and navigation path — and builds a live Site Map of all discovered pages and interactions. No goal needed; the agent maps whatever it can reach.
To activate: click the Explore toggle in the input toolbar.
Attaching Context
You can give the agent richer context before it starts:
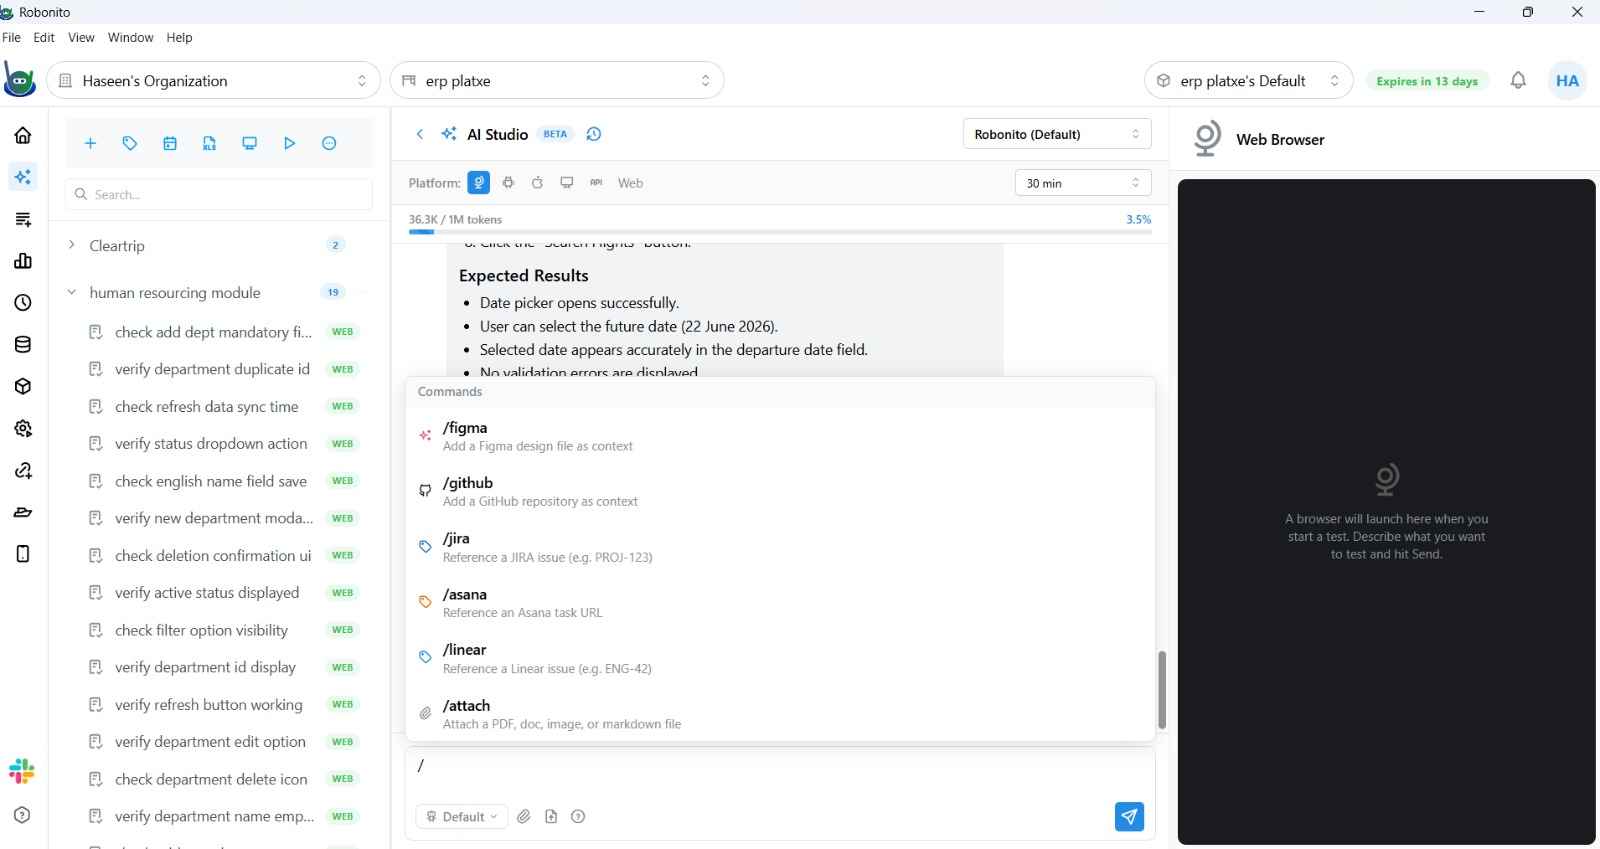
- Files — attach text files, images (screenshots/mockups), or documents using the Attach (paperclip) button.
- Figma frames — type
/figmain the chat to link a Figma frame URL. The agent uses the design as a reference for what the UI should look like. - GitHub files — type
/githubto link a specific file or PR for context. - Jira issues — type
/jirato attach a Jira issue. The agent reads the acceptance criteria and uses it to design the test. - Linear issues — type
/linearto link a Linear issue. - Asana tasks — type
/asanato link an Asana task.
Human-in-the-Loop (HITL)
During a complex flow, the agent may pause and ask for your help — for example, when it encounters a CAPTCHA, a 2FA prompt it cannot solve, or an ambiguous UI state. A HITL card appears in the chat asking you to take over the browser momentarily. Once you complete the blocked step, click Resume and the agent continues from where it left off.
Saving Generated Test Cases
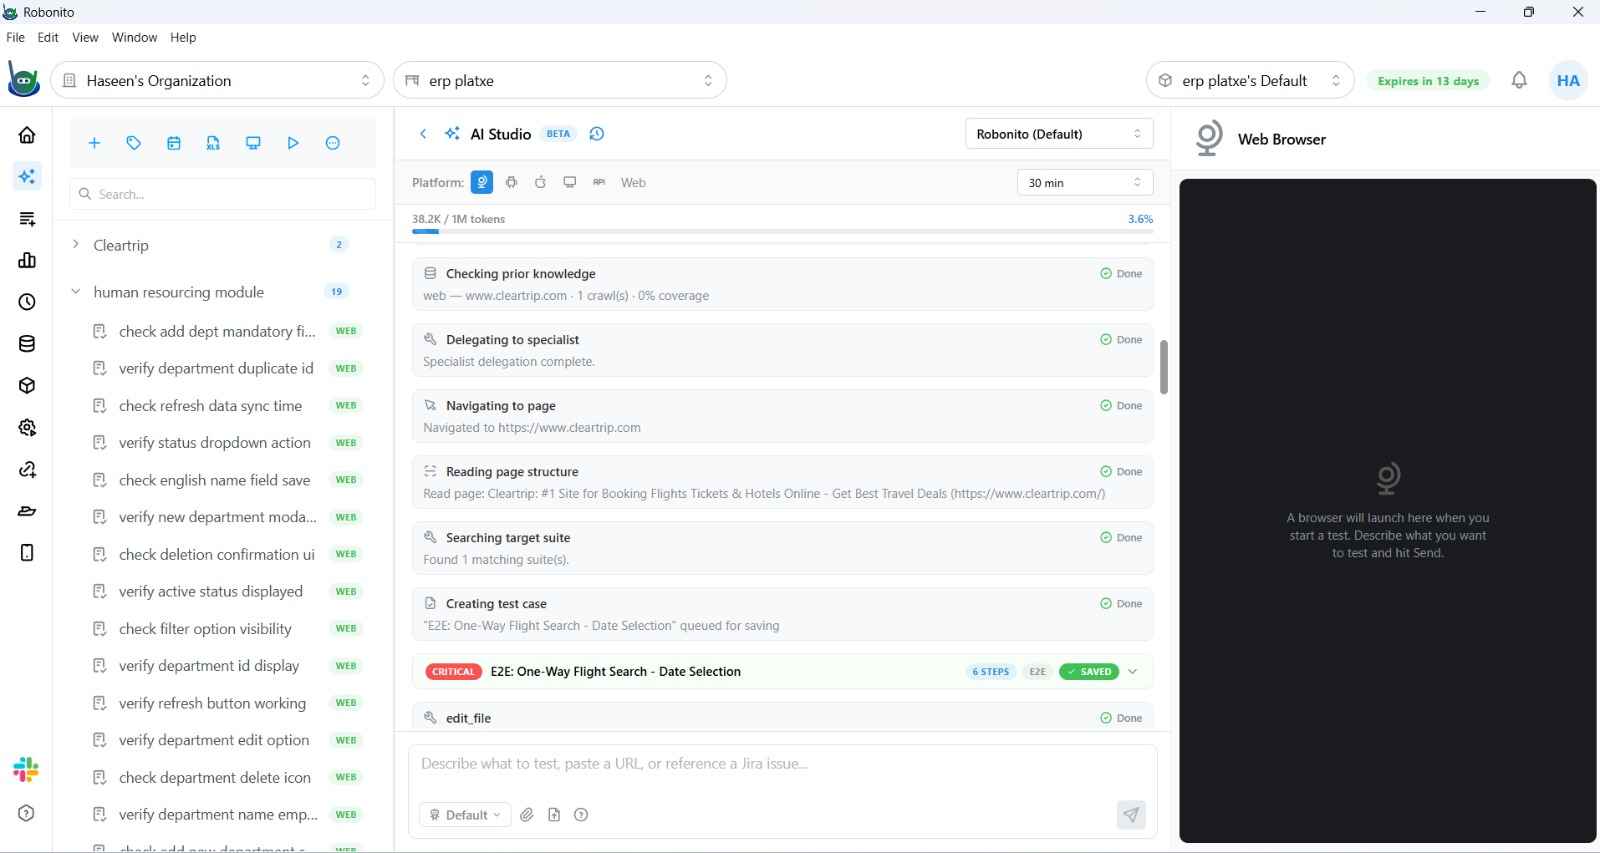
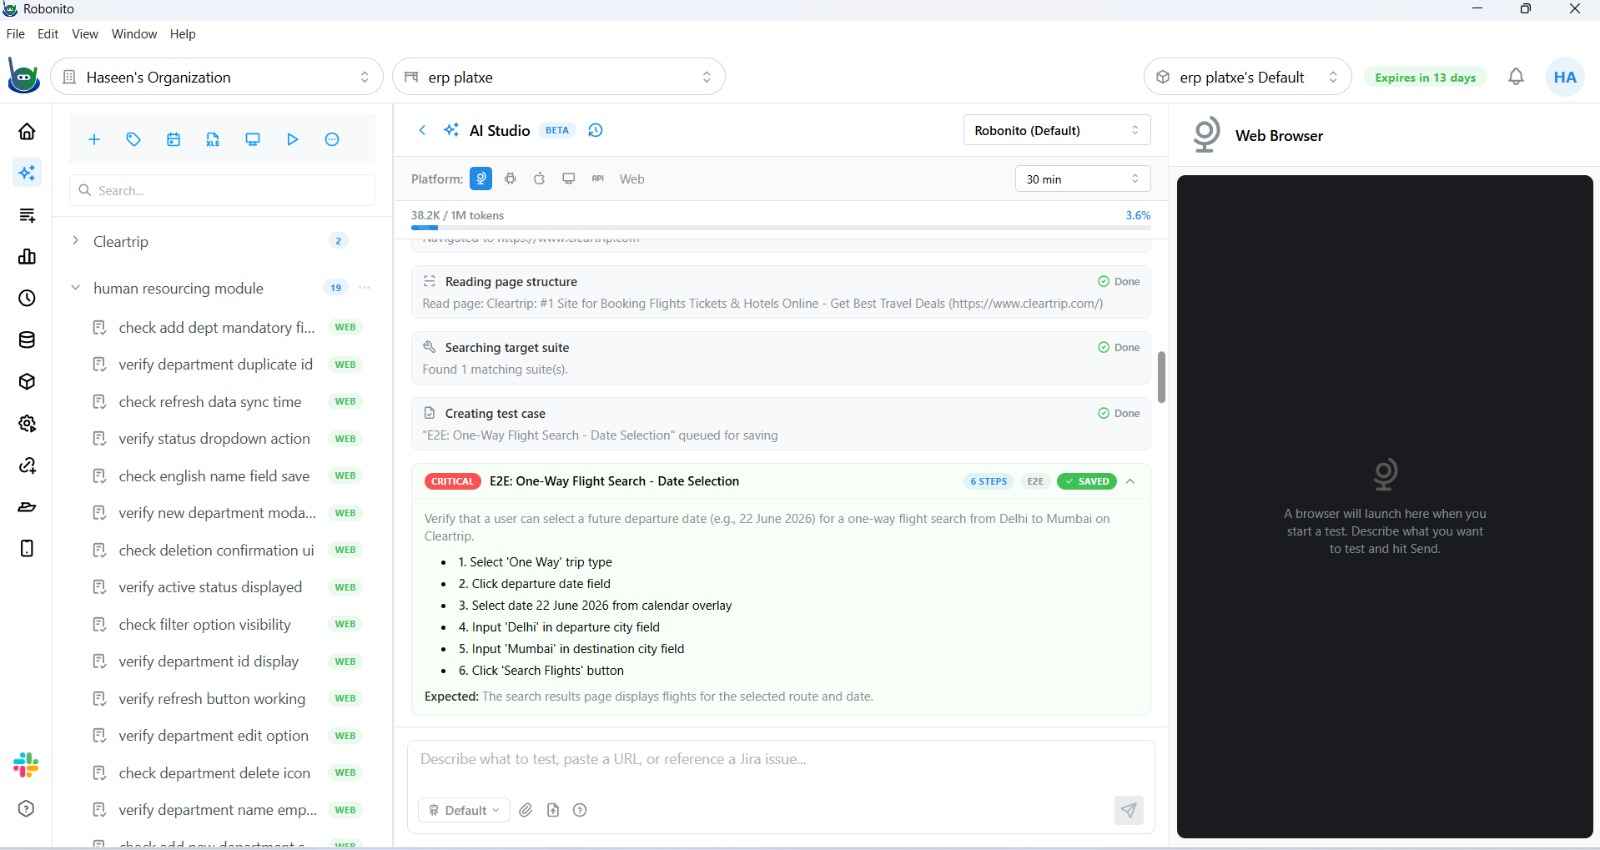
When the agent finishes, a test case card appears inline in the chat showing the generated steps. To save it:
- Click Save to Suite on the test case card.
- Select the target suite from the dropdown.
- Click Save. The card shows a ✓ Saved indicator and the test case is immediately available in your Test Explorer.
Session History
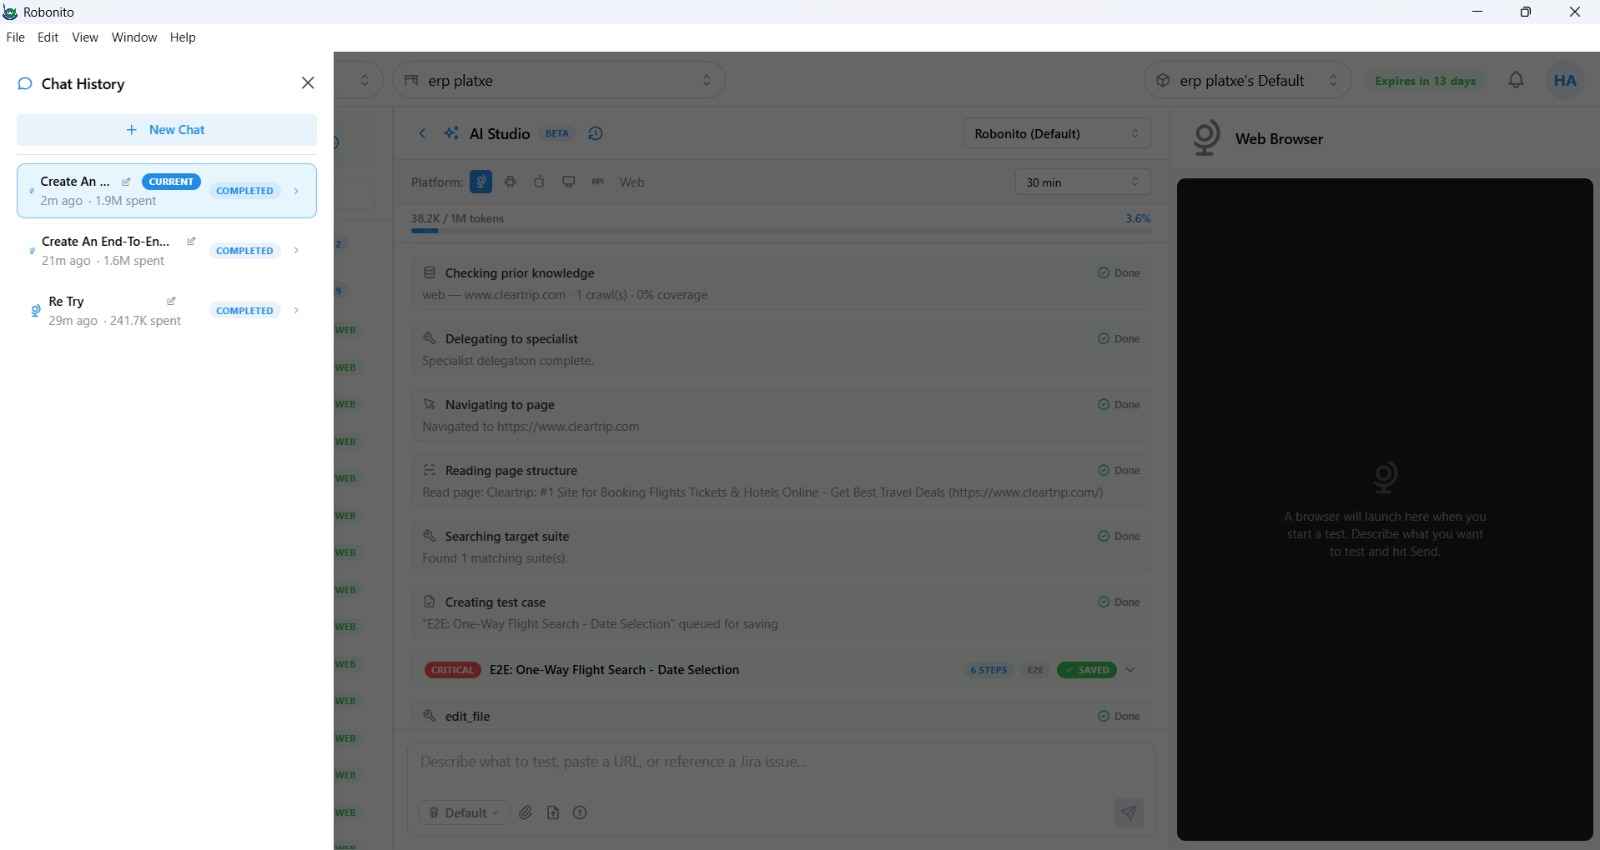
Every AI Studio conversation is saved as a Thread. To revisit a past session:
- Click the History icon (clock icon) in the AI Studio header.
- Browse your thread history — each entry shows the original prompt and the platform used.
- Click any thread to resume it. The agent loads the full conversation context and can continue from where you left off.
Bug Classification
After an AI-generated test is saved and executed, if a step fails, AI Studio classifies the failure:
| Classification | Meaning |
|---|---|
real_bug | A genuine defect in the application |
env_issue | The environment was misconfigured or unavailable |
selector_broken | The UI element's selector changed since recording |
flaky | The step passes sometimes and fails other times |
inconclusive | Not enough evidence to classify |
Classifications are shown as colored pills in the chat alongside severity (low, medium, high). Use the Log Issue button on any bug pill to create a Jira, Linear, or Asana issue directly from the failure.
Token Usage
A Token Tracker in the AI Studio header shows real-time token consumption for the current session — input tokens, output tokens, and tokens-per-minute. This is especially useful when using models billed by the token (Anthropic, OpenAI, Google). The tracker resets at the start of each new thread.
Mobile Testing with AI Studio
For Android and iOS platforms, the agent mirrors the device screen live and interacts via touch events (tap, swipe, type) just like a human tester. Select the target device from the Device dropdown when using Android or iOS mode.
See also: Mobile Setup → | iOS Setup →